Make Amazing Wordcloud in Python
When working with data, representing it in a intuitive and consumable form is a crucial task.
A visual representation of data is always helpful to get a sense of trend and outliers which may be difficult or time taking to find when analyzing the data numerically.
When the data type is numeric one can make different type of charts. When the data type is alphabetic or “string” word clouds” are handy to visualize non-numeric data.
Lets Dive into how can we make a “Wordcloud” using python :
- Setup
- Simple Wordcloud
- Data for wordcloud
- Customized Wordcloud
- Masked WordCloud
- Color Image masked Wordcloud
To make WordCloud in python we will need the “wordcloud” module.
To install the ‘wordcloud‘ module run the following command in cmd:
pip install wordcloudWordcloud depends on “Numpy” module for efficient array calculation and “Pillow” for image processing tasks.
Additionally we can save and show the generated wordclouds using ‘matplotlib’ module
Install the below additional modules before jumping to code:
Additional Modules required (Pre-requisite setup)
pip install numpy
pip install matplotlib
pip install pillow
Data for wordcloud
Any Text file can be used as ‘data’ for making wordcloud.
For this tutorial we will use “Romeo & Juliet” Novel in text format.
Download Romeo & Juliet .txt file. Romeo and Juliet.txt
Now, we are ready to dive into the code and generate some “WooooordCloud”.
Simple Rectangular Wordcloud
First Rule of python “Import the necessary modules”
import numpy as np
 #neccessary for wordcloud
from PIL import Image,ImageOps
 #pillow module neccessary for wordcloud
import matplotlib.pyplot as plt
 #to show and save image
from wordcloud import WordCloud,STOPWORDS,ImageColorGenerator #the real wordcloud module
from scipy.ndimage import gaussian_gradient_magnitude #edge detection
Now, we will read the text from the downloaded text file.
file=open("sample_data/romeo.txt",'r')
text=file.read()
Generate WordCloud save and display the output
canvas_width=1920
  #width of the output image
canvas_height=1080  #height of the output image
wordcloud = WordCloud(width=canvas_width,height=canvas_height).generate(text)
 #generate wordcloud
wordcloud.to_file("simple_wordcloud.png") #save the output wordcloud in png format
plt.imshow(wordcloud, interpolation='bilinear')
 #show the image output
plt.axis("off")
plt.show()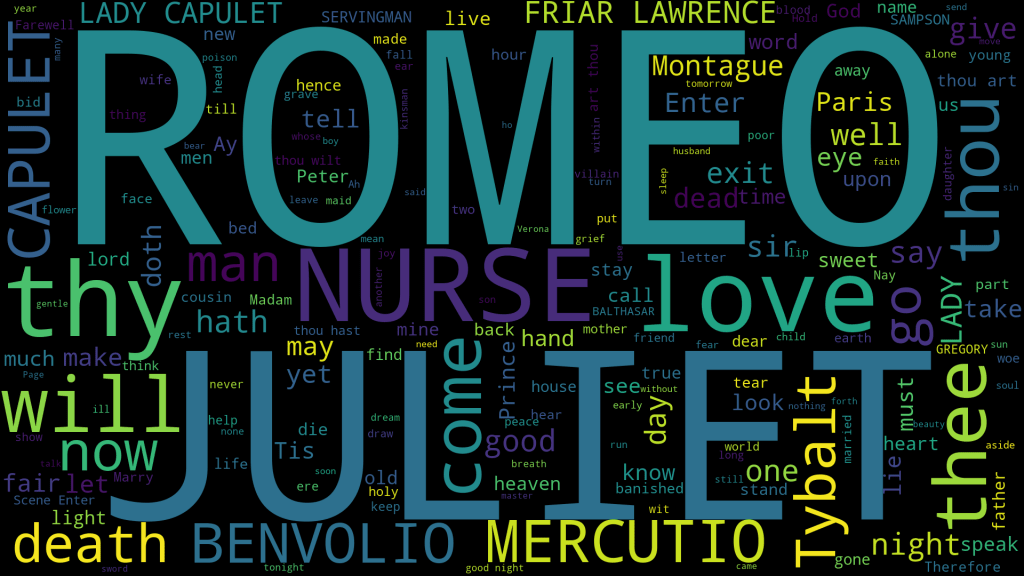
After running the above steps you will be able to generate a simple wordcloud with default parameters.
But wordcloud is more creative than just making a rectangle with words in it. Lets explore what else we can do with Wordclouds.
Before moving forward, by default wordcloud generates random patterns on every run, this randomness can be fixed by setting the seed in ‘random_state’ parameter in the wordcloud function.
wordcloud = WordCloud(random_state=1).generate(text) # replace 1 with any number to get different resultList of wordcloud parameter.
- width – to set canvas width
- height – to set canvas height
- max_font_size– set the maximum size of word
- min_font_size – set minimum size of word
- background_color- set background color of the canavas
- mask – to make wordcloud in a specific region
- random_state – to set seed (stops generating random output)
- realtive_scaling– scale word size based on there frequency
- colormap- add a color scheme to the words
- contour_width– set width of the contour
- contour_color – set color of contour
- stopword– to exclude a word from the wordcloud
Basic customization in wordcloud
Let’s try to change:
- background_color to white
- max_font_size to 40
- min_font_size to 10
- color_map to ‘hot’
- random_state to 1
- add stopword ‘thy’
All the above customizations can be done by passing value to the parameter.
stopwords = set(STOPWORDS)
stopwords.add("thy")
wordcloud = WordCloud(stopwords=stopwords,background_color='white',random_state=1,colormap='hot',max_font_size=800,min_font_size=20,width=canvas_width,height=canvas_height).generate(text)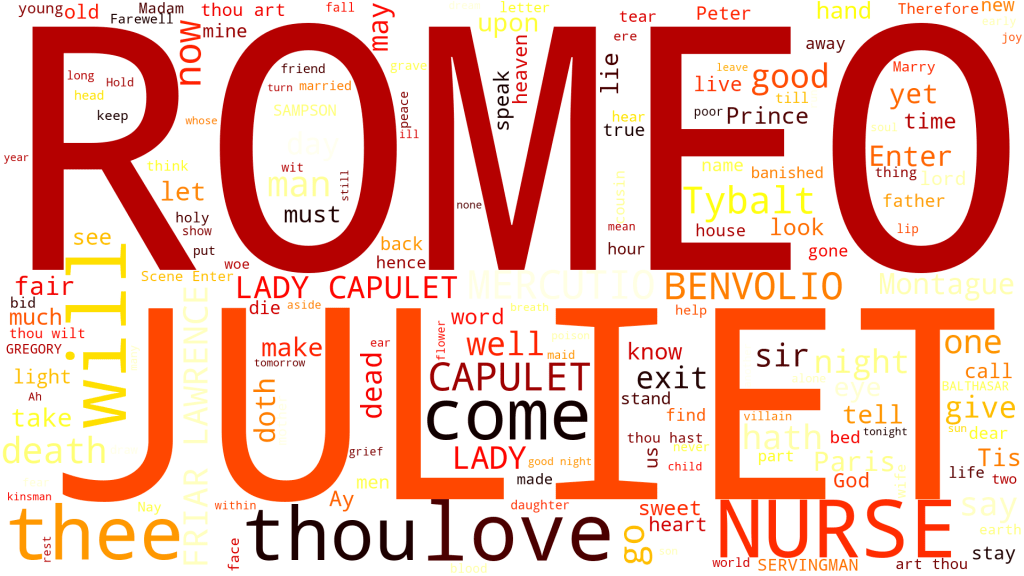
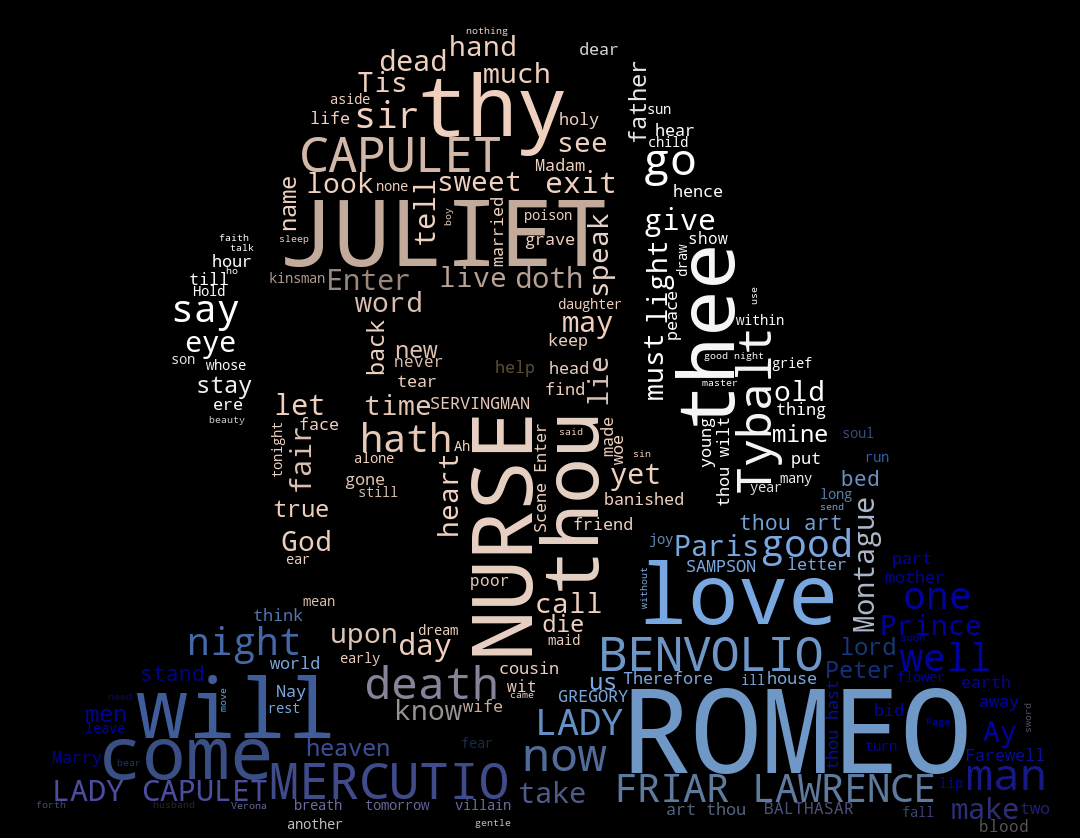
Simple Masked WordCloud
In this segment we will generate wordcloud which is confined in a boundary.

A mask image can be a binary black and white image, the wordcloud will confine in the black area.
For this tutorial we will use the following image.->
romeo_mask= np.array(Image.open("sample_data/romeo_mask.jpg"))
 #read image
wc = WordCloud(mask=romeo_mask,colormap='inferno',random_state=5,max_font_size=50,min_font_size=0)
 configure wordcloud
wc.generate(text)
 #generate wordcloud with text data
wc.to_file("masked_wc.jpg")
 #save image
plt.imshow(wc, interpolation='bilinear') #show image
plt.axis("off")
 #off axis on image
plt.show() #show image
Output of masked wordcloud
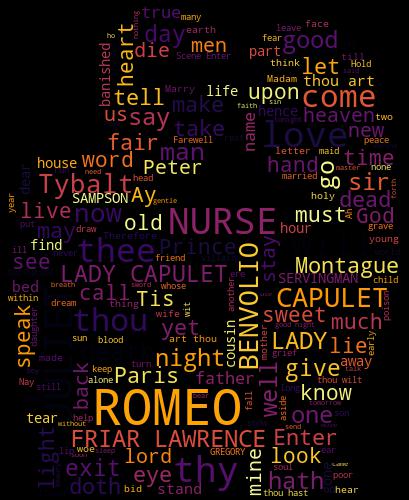
Masked with Image Color retained Wordcloud
The above example use black and white image for masking, for this section we will use a color image to generate a masked wordcloud. This wordcloud will also sample the color of the image.

Image used to mask ->
image = np.array(Image.open("sample_data/romeo_color.jpg"))


image_mask = image.copy()
image[image_mask.sum(axis=2) == 0] = 255

edges = np.mean([gaussian_gradient_magnitude(image[:, :, i] / 255., 2) for i in range(3)], axis=0)
image_mask[edges > .1] = 255
wc = WordCloud(background_color='black', mask=image_mask, mode='RGBA')
wc.generate(text)
image_colors = ImageColorGenerator(image)
wc.recolor(color_func=image_colors)
plt.figure(figsize=(10, 10))
plt.imshow(wc, interpolation="bilinear")
wc.to_file("color_masked_wordcloud.png")
Output of color masked Wordcloud

Try playing with different parameters, make some awesome wordclouds and share it in the comments.
Working code of make wordcloud in python. Click Here
Generate WordCloud in online python compile code open to . Fork it, Edit it, Recreate it. Click Here
Wordcloud Module : Documentation