
Pyhton Jupyter Notebook Basics with Cheatsheet
Jupyter notebook is been extensively used by programmers especially data scientists to write and test there code. It also helps the programmer to save the graphs and results and get the same replicate the result every time they run the notebook. Also, Jupyter notebooks can be exported into different formats like .pdf, .py, .html, .txt which helps to publish the notebook as a research paper without editing.
The Jupyter notebook runs on a web browser and uses the IPython Kernel to run the code. IPython Kernel enables the functionality of executing the code line by line which helps in better debugging and understanding the functionality of each line in the program.
Every notebook runs on a web browser and uses the IPython Kernel to run the code. IPython Kernel enables the functionality of executing the code line by line which helps in better debugging and understanding the functionality of each line in the program.
If you have not installed jupyter notebooks yet check “Installing Jupyter Notebooks” or install the standalone jupyter lab desktop application to use jupyter notebooks.
You can also try jupyter notebooks online at “Online Jupyter Notebook”
Launching Jupyter Notebooks
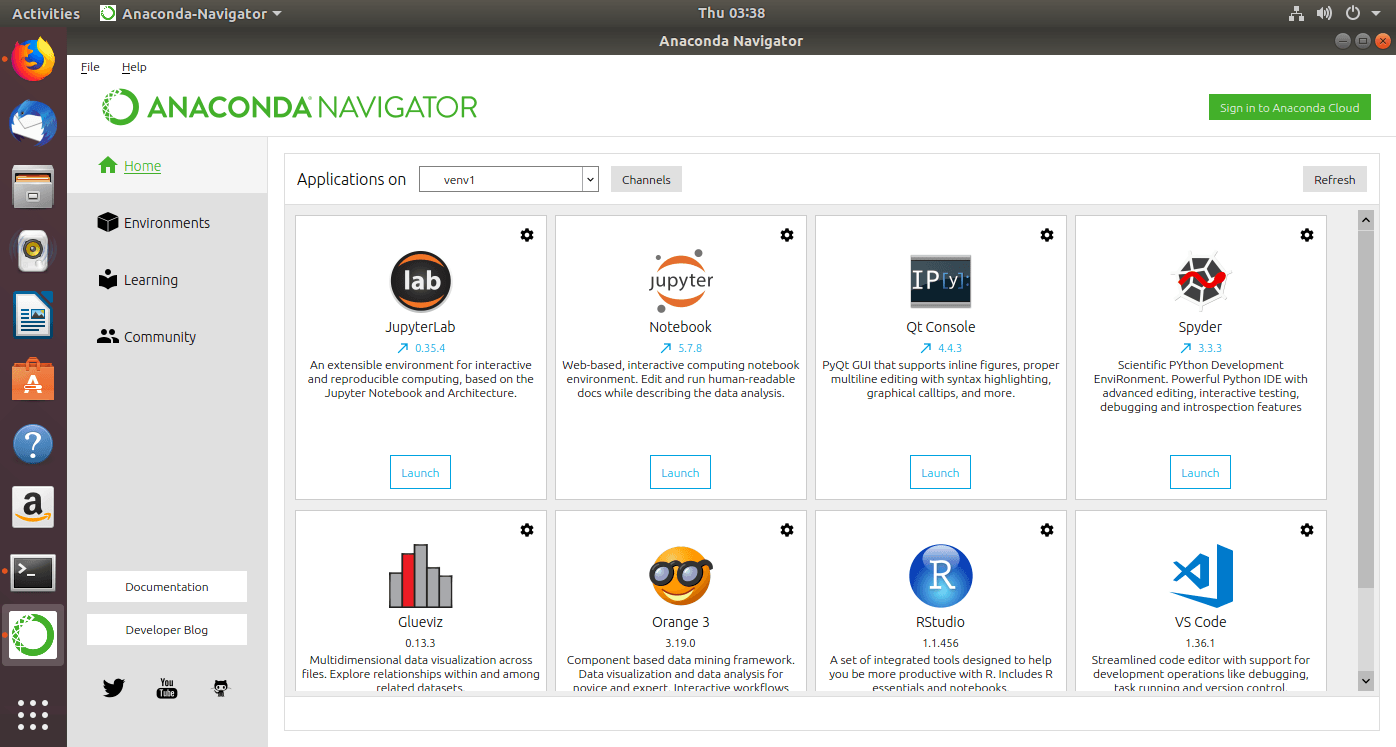
- If you have anaconda installed you can run jupyter notebook from anaconda navigator.
- Jupyter Notebook can be run directly from the command prompt by typing
jupyter notebookin the command line window.
Every time you run jupyter notebook it launches a web browser and the IPython kernel on the localhost:8888 by default.
The first thing that you will see is the list of all the files and folder in the directory from where the jupyter notebook command is executed.
Create a New Notebook:To create a new Python3 Notebook click on the new button on the left corner.

Now, You have a new notebook created with the name “Untitled1” every notebook is saved with the file extension “.ipynb“.
Renaming Notebook: Click On the name “Untitled1” at the right corner of the notebook.
Parts of each Notebook:
- The Menubar

- Shortcut Buttons

- Cells

What are Cells?
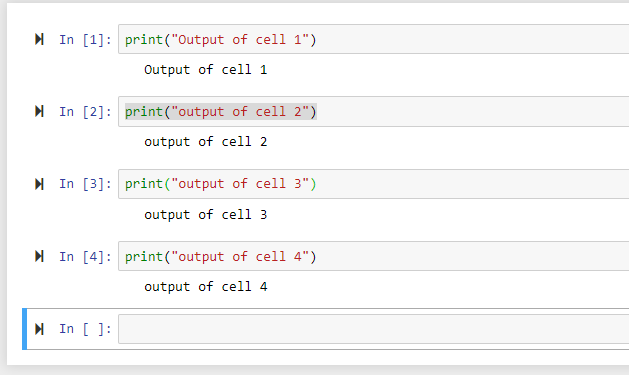
Remember we said jupyter notebooks enables line-by-line interpretation of the code. That’s what cells are there for. Each cell is can contain a snippet of code and can be run individually. The output such as “print” is displayed just below the cell. Hence you can break the program into small independent cells and achieve maximum readability and control over your program.
Edit Mode and Command Mode.
Each cell can be in one of the two modes:
- Edit Mode
- Command mode
Edit Mode (Green Cell)
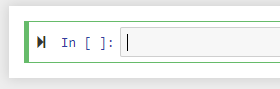
When the cell is in edit mode you can directly write text in the cell and execute cell by pressing “Ctrl+Shift+Enter” or clicking the run shortcut button in the “Shortbat bar“
Command Mode (Blue Cell)
When in command mode you can use keyboard shortcuts to run a cell, add a new cell, delete cells and other useful shortcuts mentioned below and in the cheatsheet.
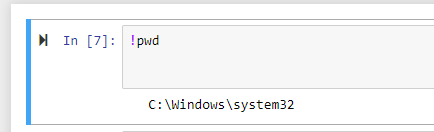
Executing Command prompt/Terminal commands.
You can directly execute command line commands in a notebook by writing ! followed by your command (eg- pwd) in the cell and executing the cell.
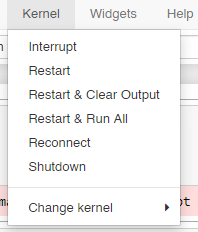
Resetting and Intruppting Kernel
To clear stored variable values of the notebook or interrupting the execution if the notebook you can use Reset Kernel or Interuppt Kernel option present in Kernel Dropdown in the menu bar.
This is the basics of Jupyter Notebook to get you up and running in using Notebooks to make your programming experience great for more advance stuff stay tuned.