How to setup your own MQTT broker on RaspberryPi 4
If you are making IoT-based products or projects MQTT is a go-to protocol to connect your devices and enable messaging between them. MQTT is an OASIS standard messaging protocol for the Internet of Things (IoT). It is designed as an extremely lightweight publish/subscribe messaging transport that is ideal for connecting remote devices with a small code footprint and minimal network bandwidth. MQTT today is used in a wide variety of industries, such as automotive, manufacturing, telecommunications, oil and gas, etc.[MQTT ORG]
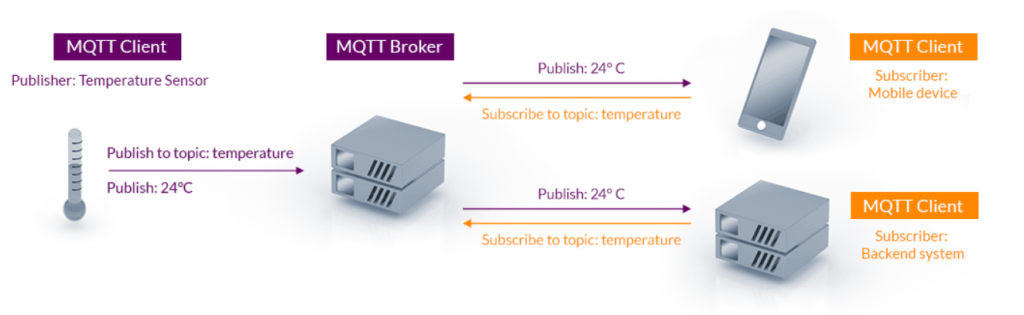
To implement the MQTT protocol MQTT broker is the backbone of the architecture. The MQTT broker is responsible to provide an interface where the clients can publish messages to a topic and subscribe a topic to receive messages.
There are many MQTT broker listed on the official MQTT website. Some of them are
- Ably MQTT Broker
- Akiro by Senetienz
- Apache ActiveMQ
- Cassandana
- flespi
- HIVE MQ
- IBM MQ telemetry
- MOSCA
- Mosquitto
- MQTTnet
- Mqttwk
- RabbitMQ
- Thingscale IoT message broker
Every broker has different use case and special functionality to cater some specific use case.
For this tutorial, we will be using Mosquitto Broker which is an opensource MQTT broker developed and maintained by Eclipse.
I am using Raspberry Pi 4 but the Broker can be setup on Ubuntu and Windows also. If you get any error feel free to comment.
Setup Mosquitto Broker on Raspberry Pi 4
Install Mosquitto Broker
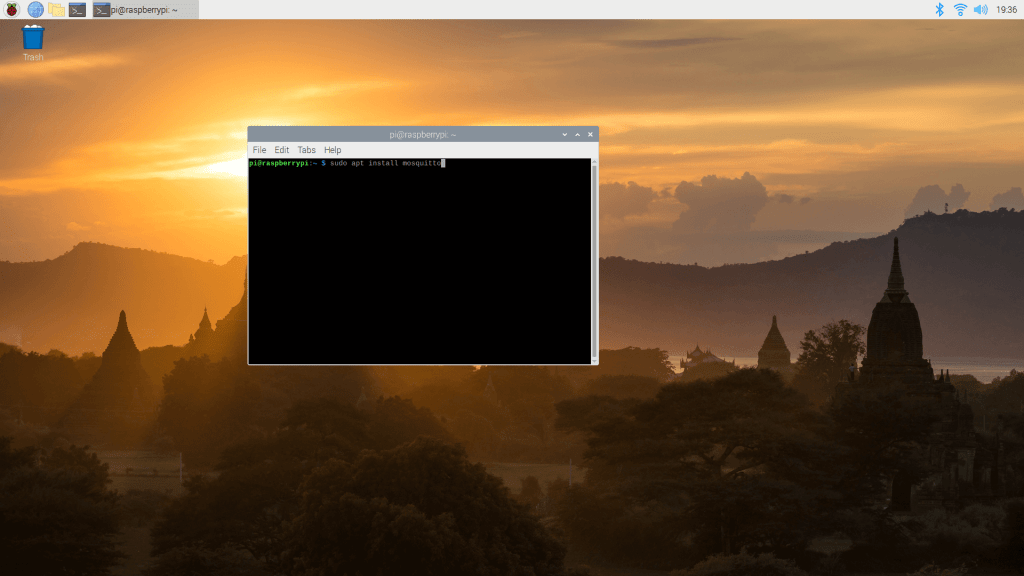
Open terminal by pressing ctrl + alt +T
Run the command
sudo apt install mosquitto
Run Moquitto Broker
After the Mosquitto broker is installed we have to start the MQTT service.
To start the Mosquitto MQTT broker run the command
sudo mosquitto -v
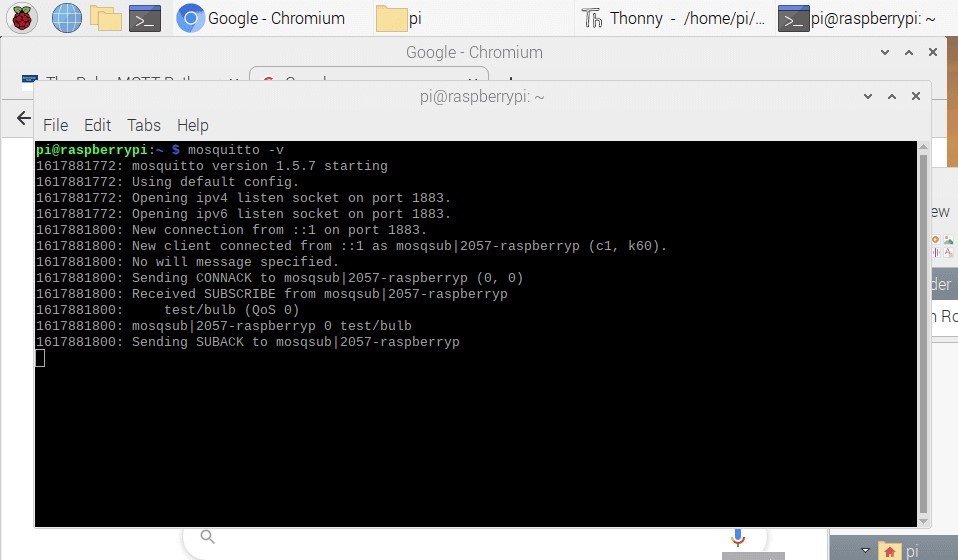
Note: the -v argument enables verbose while starting the mosquitto broker. By default the verbose level is set to minimal. To log all the verbose in the console we will have to chance the config file. Follow the below steps to enable extended verbose on Mosquitto broker.
- Use any text editor and open mosquitto.conf file located /etc/mosquitto. You might need sudo previliages to save the edited file
- Add logs_type all in mosquitto.conf file an save.
- restart the mosquitto broker and run using mosquitto -v to get all the logs of broker in console.
Verify if MQTT port is open
By default MQTT listens on port 1883 on the IP of the host. You can check if the port is open or not by using the command
sudo netstat -at
Create a subscriber
With addition to the broker moquitto package also includes moquitto_sub and mosquitto_pub to create suscriber and publisher for quick testing of the broker.
To create a subscriber on the same host use command.
sudo mosquitto_sub -t “test/bulb”
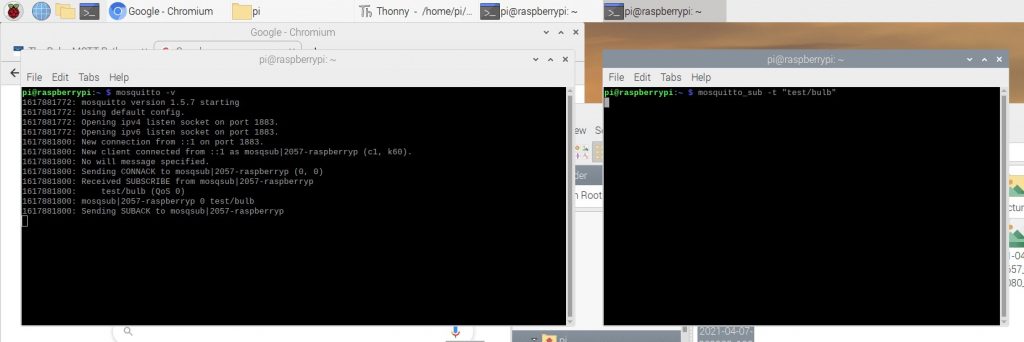
here -t argument is followed by the topic to subscribe. In our case the topic is “test/bulb”
As soon as you create a subscriber you will see subscribe request log in the mosquitto verbose terminal.
Creating a publisher
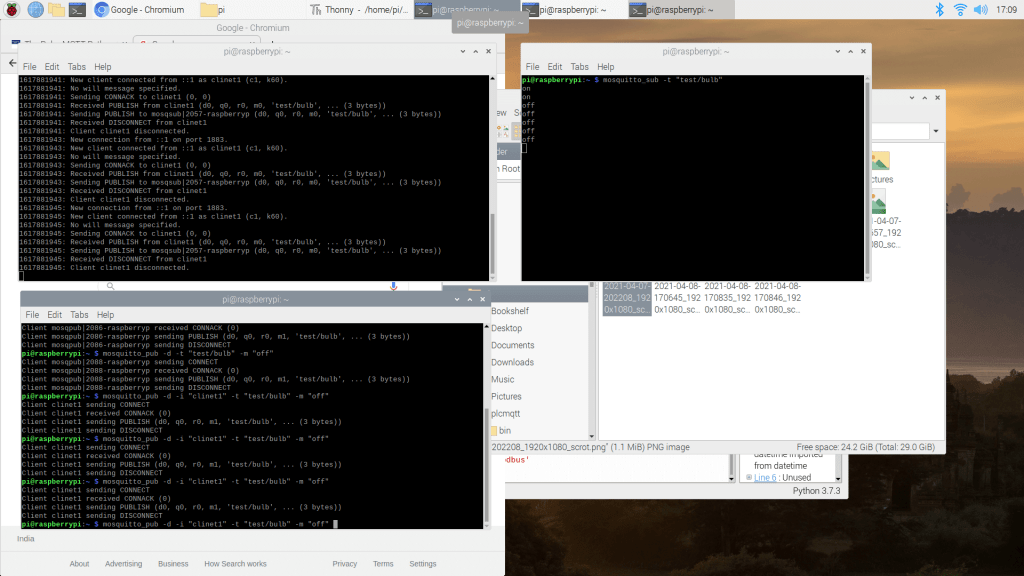
To create a publisher which can publish message on the topic “test/bulb” use mosquitto_pub with topic and message argument.
sudo mosquitto_pub -t ‘test/bulb’ -m ‘off’
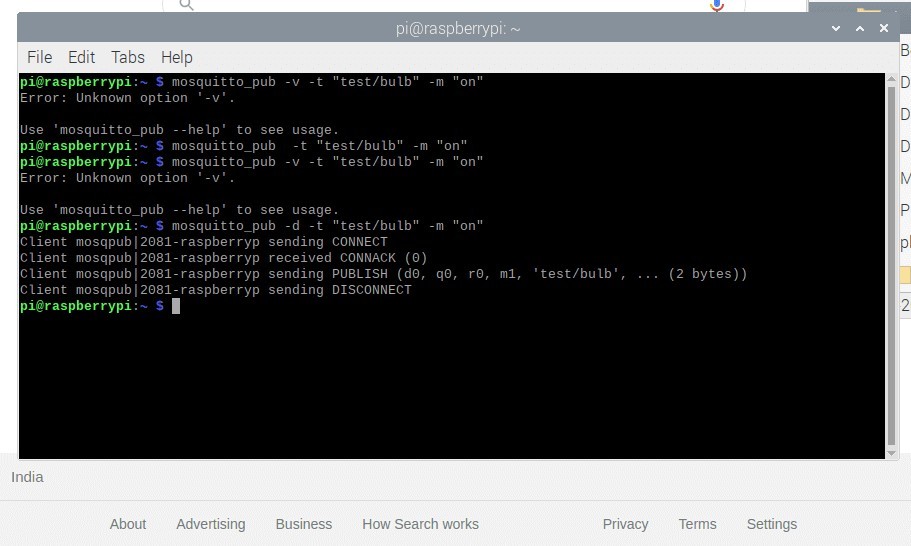
Note, Topic of the subscriber and publisher should be same to see the output. To enable debugging on publisher side use argument -d.
As, soon as the publisher is created you will see the logs on the broker terminal and the message in the subscribers terminal.
This was the basic setup of the mosquitto broker on Raspberry pi 4.
The Mosquitto broker can further be improved by enabling security features like authentication, SSL, keys and cerficates etc.
If this tutorial helped you please leave a comment to encourage me to enable security features on the Mosquitto Broker.