Select ROI or Multiple ROIs [Bounding box] in OPENCV python.
![Select ROI or Multiple ROIs [Bounding box] in OPENCV python.](/content/images/size/w1200/wordpress/2020/08/Select-roi-in-opencv-python.png)
In this tutorial, we will learn how to Graphically select a Region of interest (ROI) in an image and save it.
There are two functions which can be used to select ROI or ROIs in OPENCV.
- “cv2.selectROI” which can be used to select a single ROI bounding box.
- “cv2.selectROIs” which is used when you want to select multiple ROI from an image.
Selecting Single ROI bounding Box in OpenCV [python].
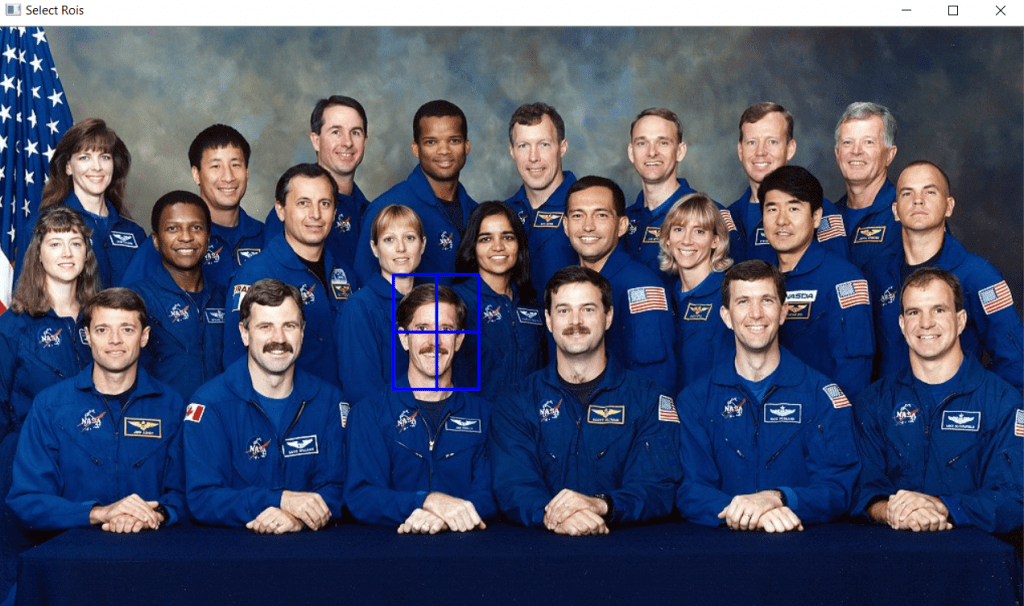
Selecting a single ROI is useful when you are sure you have to crop a single subject/ ROI from the image.
Click and drag the mouse to make bounding box on the image . Press enter to finish selecting ROI and resume the program.
Steps to crop a single single subject from an image.
- Import the necessary libraries.
- import cv2
- import numpy
- Read the image by using “imread” function.
- img_raw=cv2.imread(img_path)
- Pass the image in “SelectROI” function.
- roi=cv2.selectROI(img_raw)
- save the selected rectangle point (roi) in a variable.
- roi variable will save xy coordinate of left top corner and bottom right corner point of bounding box
- Use the rectangle points to crop.
- roi_cropped=img_raw[int(roi[1]):int(roi[1]+roi[3]), int(roi[0]):int(roi[0]+roi[2])]
- Display the Cropped ROI
- cv2.imshow(“ROI”,roi_cropped)
- Save the cropped ROI.
- cv2.imwrite(“roi.jpeg”,roi_croppped)
Select ROI code [Python Code]
import cv2
import numpy as np

 #image_path
img_path="image.jpeg"

#read image
img_raw = cv2.imread(img_path)

#select ROI function
roi = cv2.selectROI(img_raw)

#print rectangle points of selected roi
print(roi)

#Crop selected roi from raw image
roi_cropped = img_raw[int(roi[1]):int(roi[1]+roi[3]), int(roi[0]):int(roi[0]+roi[2])]

#show cropped image
cv2.imshow("ROI", roi_cropped)

cv2.imwrite("crop.jpeg",roi_cropped)

#hold window
cv2.waitKey(0)
Selecting Multiple ROI bounding box
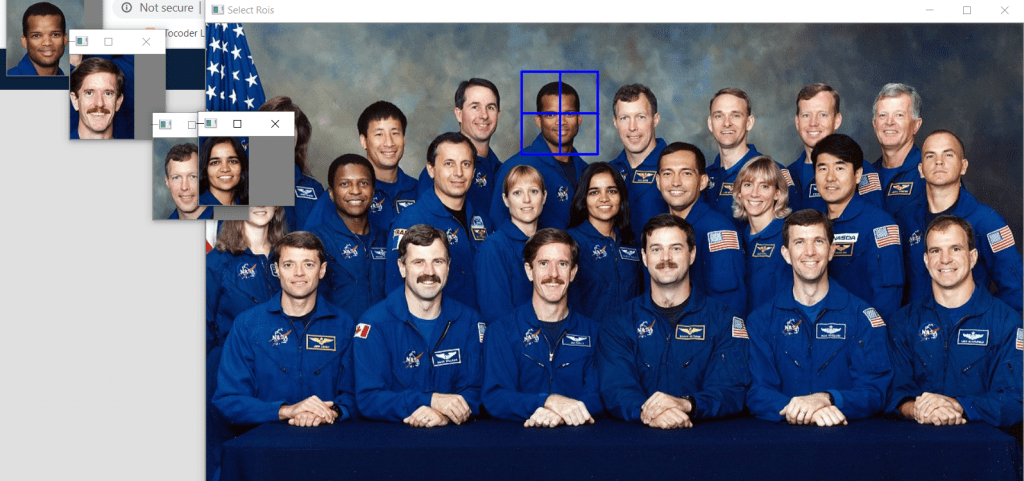
Selecting Multiple ROIs is useful when you have multiple subjects to select from an image.
Use the “selectROIs” function will save selected ROIs rectangle point in a array which can be accessed by using indexing.
Click and drag the mouse to make a bounding box on the image. Press enter every time you select a bounding box this will save your selections in ROIs variable, once you are done selecting press escape to resume the program.
Select Multiple ROIs [Python Code]
import cv2
import numpy as np

 #image_path
img_path="image.jpeg"

#read image
img_raw = cv2.imread(img_path)

#select ROIs function
ROIs = cv2.selectROIs("Select Rois",img_raw)

#print rectangle points of selected roi
print(ROIs)

#Crop selected roi ffrom raw image

#counter to save image with different name
crop_number=0

#loop over every bounding box save in array "ROIs"
for rect in ROIs:
	x1=rect[0]
	y1=rect[1]
	x2=rect[2]
	y2=rect[3]

        #crop roi from original image
	img_crop=img_raw[y1:y1+y2,x1:x1+x2]

        #show cropped image
        cv2.imshow("crop"+str(crop_number),img_crop)

	#save cropped image
	cv2.imwrite("crop"+str(crop_number)+".jpeg",img_crop)

	crop_number+=1

#hold window
cv2.waitKey(0)
Additionally You can use :
By default the bounding box is created from the top left corner but you can also use fromCenter= true argument to start bounding box from the center.
You can disable the cross hair by using showCrosshair= false argument .
Check Out how to Extract Text from Images.– Click Here
Some Important links
Start learning python for free [Codecademy] [DataCamp]
Host your web app [DigitalOcean]
Learn a new Skill [SkillShare] Free one-month trail
Learn Product Design UI/ UX [Skill share] Free one-month trial
Register your .com domain name [Namecheap]
Get certification from top universities [Coursera]
Python for Everybody [Getting started with python]
Google-certified Python Course Crash Course in python
A VPN to stay anonymous & secure on web [AtlasVPN]
I may earn a small commission if you purchase the product from my links. This is one of the ways you can support this blog. The little commision we earn helps us bear the cost of hosting, paying for tools, and making new content. Thank you for your support